
Windows 10 & Remote IoT VPC SSH: Setup Guide & Tips
Are you ready to unlock the full potential of your Internet of Things (IoT) devices and securely connect them to a virtual private cloud (VPC) environment, all from the comfort of your Windows 10 machine? This guide provides a comprehensive roadmap for navigating the intricate landscape of Remote IoT VPC SSH, empowering you to establish robust and secure connections without the need for additional, cumbersome tools.
If you're here, chances are you're looking to dive deep into the world of Remote IoT VPC SSH on Windows 10. Whether you're a tech enthusiast, a developer, or just someone trying to get their hands dirty with remote connections, you've come to the right place. This comprehensive guide will walk you through the steps required to set up a secure Remote IoT VPC SSH connection on Windows 10. From configuring your VPC to establishing an SSH tunnel, we'll cover everything you need to know. This article aims to provide a comprehensive guide to setting up and managing remote IoT connections via Virtual Private Cloud (VPC) using SSH directly on Windows 10, without the need for additional tools. Youll learn about the prerequisites, configuration steps, troubleshooting tips, and best practices to ensure a secure connection.
As the demand for remote connectivity grows, understanding how to configure and manage Secure Shell (SSH) connections within a Virtual Private Cloud (VPC) environment is crucial. Remote IoT VPC SSH Raspberry Pi download Windows 10 free file is more than just a string of technical terms it's a gateway to unlocking advanced computing possibilities. Whether you're a tech enthusiast, a developer, or someone exploring the potential of IoT devices, this combination of tools and technologies can revolutionize how you interact with your Raspberry Pi and other IoT devices.
- Telugu Movies Movierulz Updates Latest News Streaming Info
- Movie News Reviews Bollywood Tollywood More Find On Justwatch
| Aspect | Details |
|---|---|
| Concept | Remote IoT VPC SSH |
| Definition | Connecting to a Virtual Private Cloud (VPC) hosting IoT devices using Secure Shell (SSH) from a Windows 10 machine. |
| Core Technologies | Windows 10, OpenSSH, PowerShell, Virtual Private Cloud (VPC), Raspberry Pi (Optional), IoT Devices |
| Primary Functionality | Securely manage and access IoT devices remotely. |
| Key Benefits |
|
| Target Audience | Tech enthusiasts, developers, IoT professionals |
| Common Use Cases |
|
| Essential Prerequisites |
|
| Steps Involved |
|
| Troubleshooting |
|
| Best Practices |
|
| Relevant Website | Microsoft OpenSSH Documentation |
Before embarking on this journey, let's clarify why Windows 10 stands out as an ideal platform for Remote IoT VPC SSH. The operating system includes powerful features like PowerShell and OpenSSH. These built-in tools significantly streamline the configuration process, eliminating the need for third-party software and providing a streamlined, integrated experience. This simplifies the process, making it accessible to both seasoned professionals and newcomers alike.
Let's dive into the specific advantages of using Windows 10 for this purpose:
- Built-in OpenSSH Client: Windows 10 natively supports OpenSSH, eliminating the need to install a separate SSH client. This simplifies the initial setup and ensures compatibility.
- PowerShell Integration: PowerShell allows for advanced scripting and automation of SSH tasks, making it easier to manage and configure connections.
- User-Friendly Interface: Windows 10 offers a familiar and intuitive interface, making it easy to navigate and configure the necessary settings.
- Security Features: Windows 10 incorporates robust security features, ensuring a secure environment for your remote connections.
- Versatility: Windows 10 is compatible with a wide range of hardware and software, making it a versatile choice for various IoT projects.
- Active Community Support: A large and active community provides ample resources, documentation, and support for troubleshooting and best practices.
Setting up Remote IoT VPC SSH on Windows 10 involves several steps, starting with ensuring you have an SSH client installed. Fortunately, with recent Windows 10 versions, the OpenSSH client is often included. To activate it, follow these steps:
- 2025 Movie Guide Watch Online Reviews More Movierulz Beyond
- Find Movies More Latest Updates Reviews Movierulz Streaming
- Go to Settings > Apps > Apps & features > Optional features.
- Click "Add a feature."
- Find "OpenSSH Client" in the list and select "Install".
- Similarly, you might want to install "OpenSSH Server" if you want to connect to your Windows 10 machine from another device.
With the SSH client active, you're ready to start the real work! The next phase involves configuring your VPC (Virtual Private Cloud). This configuration is dependent on your specific cloud provider (AWS, Azure, Google Cloud, etc.). The general steps, however, remain the same:
- Set up your VPC: Create a VPC within your cloud provider's console. Define the IP address range, subnets, and other relevant parameters.
- Configure Security Groups: Create security groups to control inbound and outbound traffic. Ensure that the SSH port (typically port 22) is open for inbound connections.
- Create an Instance (Virtual Machine): Launch an instance within your VPC that you will use for SSH tunneling, ideally, this would be in a public subnet.
- Assign an Elastic IP (EIP) or Public IP: If you need a static IP address to access your instance, assign an Elastic IP (AWS) or Public IP address to the instance.
Generating SSH Keys: A secure connection relies on proper authentication. Generating SSH keys is a vital step in this process. These keys come in pairs: a private key (which you keep secret) and a public key (which you share). Open a PowerShell window and execute the following command to generate your SSH key pair:
powershellssh-keygen -t rsa -b 4096
This will prompt you to specify the file name and location for your keys. Press Enter to accept the default location (`~/.ssh/id_rsa`) and then create a strong passphrase. After this command runs successfully, you will see the public and private keys in the specified location.
You'll then want to append the content of your public key (`id_rsa.pub`) to the `authorized_keys` file on the remote server (e.g., your Raspberry Pi). This authorizes your machine to connect to the remote server. You can do this with a command such as:
bashssh-copy-id user@remote_host
This command will prompt you for the remote user's password and automatically append the key to the `authorized_keys` file.
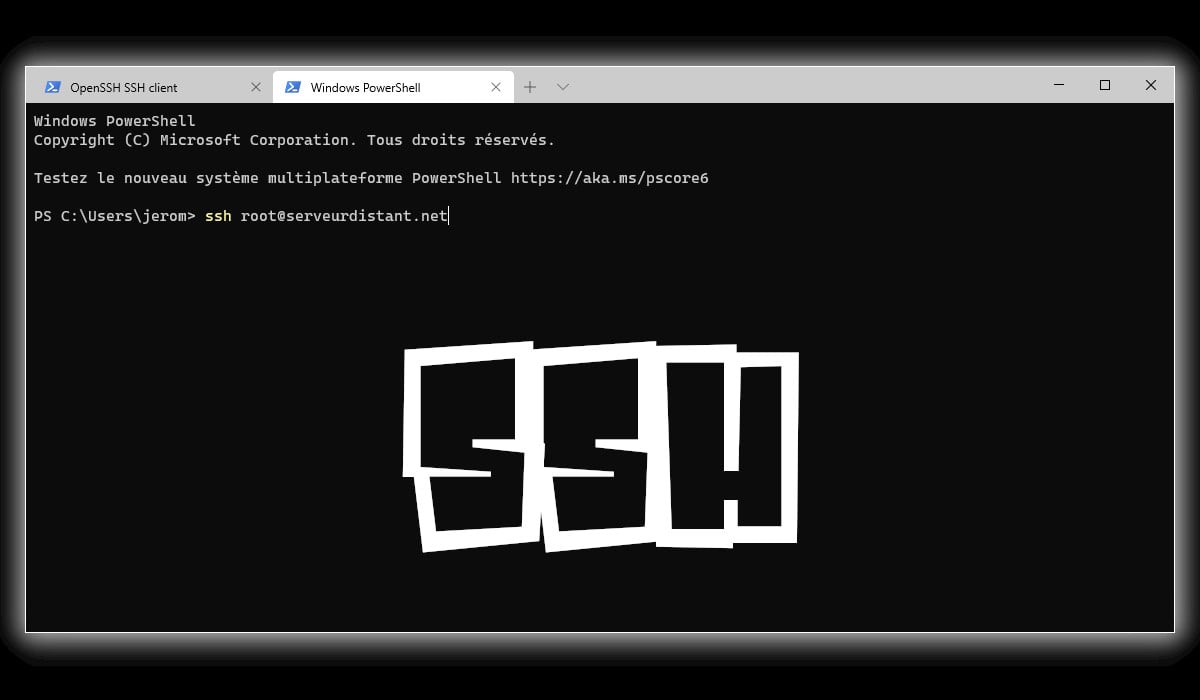
Once your public key is authorized on the remote machine, test the connection via SSH. This can be done in the command prompt or PowerShell by using:
bashssh user@remote_host
Replace `user` with the remote user and `remote_host` with the remote machine's IP address or hostname.
Connecting via SSH on Windows 10: Connecting to your Raspberry Pi via SSH on Windows 10 is made easy. Here's a basic example:
bashssh pi@your_raspberry_pi_ip_address
Replace "pi" with your Raspberry Pi username and "your_raspberry_pi_ip_address" with the IP address of your Raspberry Pi on your network. You'll likely be prompted for your password. If everything's configured correctly, you'll have a shell prompt on your Raspberry Pi!
While the primary focus of this guide is on configuring Remote IoT VPC SSH, many users are also interested in the possibility of downloading Windows 10 for free. Microsoft offers legitimate ways to obtain a free copy of Windows 10, primarily through their official website or authorized partners. However, the availability and features of the free version may vary.
Integrating with Remote IoT VPC SSH: Now that you have Windows 10 IoT Core installed, you can seamlessly integrate it with Remote IoT VPC SSH. Follow the steps outlined earlier in this guide to configure your VPC settings and establish a secure connection. This allows you to remotely manage your IoT devices that are running on Windows 10 IoT Core.
Raspberry Pi and Windows 10: Microsoft offers a version of Windows 10 IoT Core specifically designed for Raspberry Pi devices. Here's how to get started:
- Install Windows 10 IoT Core: Download the Windows 10 IoT Core dashboard from the official Microsoft website.
- Prepare the SD Card: Use the dashboard to flash the Windows 10 IoT Core image onto an SD card.
- Insert and Power On: Insert the SD card into your Raspberry Pi and power it on.
- Initial Setup: Follow the on-screen instructions to configure your device.
Troubleshooting Tips:
- Connectivity Issues: Ensure that your Windows 10 machine and the remote IoT device have network connectivity to the VPC. Check firewall rules and network configurations.
- SSH Key Authentication: Verify that your SSH keys are correctly generated and authorized on the remote device. Double-check the file paths and permissions.
- VPC Settings: Confirm that the VPC settings, security groups, and firewall rules are correctly configured to allow SSH traffic (typically on port 22).
- Incorrect Credentials: Double-check all username, password, and IP address entries.
- Incorrect SSH Client Configuration: Check your local SSH client configuration (in `~/.ssh/config`) to make sure there are no conflicting settings.
Best Practices for Security:
- Use Strong SSH Keys: Generate and utilize strong, unique SSH keys for each device and connection.
- Regularly Update: Keep your Windows 10 operating system, SSH client, and any associated software updated with the latest security patches.
- Monitor Network Traffic: Use network monitoring tools to keep track of network traffic and look for suspicious activity.
- Implement Two-Factor Authentication (2FA): Whenever possible, implement 2FA for an extra layer of security.
- Limit SSH Access: Restrict SSH access to only authorized IP addresses and users.
- Disable Password Authentication: Disable password-based login to improve security, relying on SSH key authentication.
- Use a Firewall: Configure a firewall to further limit network access and control inbound and outbound traffic.
- Review and Audit regularly: Regularly review security settings and audit access logs to ensure your system's security.
Raspberry Pi Integration: Connecting to your Raspberry Pi via SSH on Windows 10 is very straightforward. Make sure your Raspberry Pi is connected to the network, and that SSH is enabled on your Raspberry Pi device (it often is by default). Then you can establish a connection with a simple command. For example, if your Raspberry Pi's IP address is 192.168.1.100, you would open a PowerShell or Command Prompt and enter:
bashssh pi@192.168.1.100
Replace `pi` with the user name on your Raspberry Pi, and provide the password when prompted. If the setup is successful, you will have a shell on your Raspberry Pi from within your Windows 10 environment.
This ability to create a secure tunnel with SSH makes remote management straightforward, and allows for secure data transfer and other essential functions.
In closing, the combination of Windows 10's inherent capabilities, coupled with the power of Remote IoT VPC SSH, unlocks unprecedented possibilities for managing and controlling IoT devices. Embrace these tools and techniques to transform the way you connect, monitor, and interact with your remote devices.
Article Recommendations
- Unraveling The Rise Fall Of Jazmine Tans Persona
- Vegamovies Your Guide To Free Movies Streaming Options
Detail Author:
- Name : Prof. Evans Skiles I
- Username : iliana.rempel
- Email : mosciski.jeanne@turcotte.net
- Birthdate : 2006-07-19
- Address : 276 Janiya Stream Suite 213 Lisamouth, NM 75625-5198
- Phone : (253) 787-8111
- Company : Erdman Ltd
- Job : Manager of Air Crew
- Bio : Id praesentium ea voluptas. Commodi laudantium mollitia est eum molestias. Aut beatae quia sequi et provident totam. Maxime suscipit et quod laudantium.
Socials
tiktok:
- url : https://tiktok.com/@mcclure1995
- username : mcclure1995
- bio : Et amet error est. Qui non delectus perspiciatis eligendi.
- followers : 3928
- following : 2836
twitter:
- url : https://twitter.com/aracely6248
- username : aracely6248
- bio : Molestiae sit veniam doloremque voluptatibus aut. Eum ducimus temporibus quia. At ipsam sit eius quo. Atque molestiae in voluptatem aut repellat deleniti.
- followers : 6800
- following : 2214
linkedin:
- url : https://linkedin.com/in/aracelymcclure
- username : aracelymcclure
- bio : Corporis in enim illum consequatur.
- followers : 6876
- following : 1062
instagram:
- url : https://instagram.com/aracelymcclure
- username : aracelymcclure
- bio : Ex explicabo dolore doloribus aliquam rerum corrupti. Cupiditate sit non eum nihil odio magnam.
- followers : 6318
- following : 1281
